
Capturing Images from USB Camera Using C on Linux
In this tutorial, I will show you how to capture USB video using the C programming language on Linux.
Setting Up The Kernel
To capture images from your USB camera, Video4Linux must be included in the Linux Kernel. If you are running a Linux distribution like Ubuntu or Fedora, you probably already have Video4Linux included with your current kernel. Anyways, it’s important to check first. Open up a terminal, connect your USB camera, and run the command below.
ls -ltrh /dev/video*
If you get a message that says, “No such file or directory,” it’s likely that you don’t have Video4Linux setup in your kernel, or maybe you just forgot to connect the USB camera. Hopefully, it’s the second one.
If you were able to find the camera, go to the next step. If you didn’t, keep reading.
To enable Video4Linux you are going to have to reconfigure your kernel. The first step is to find where the source of your kernel is. Once you have found your kernel source, run the following command.
make menuconfig
The first thing you need to include in your kernel configuration is multimedia support.
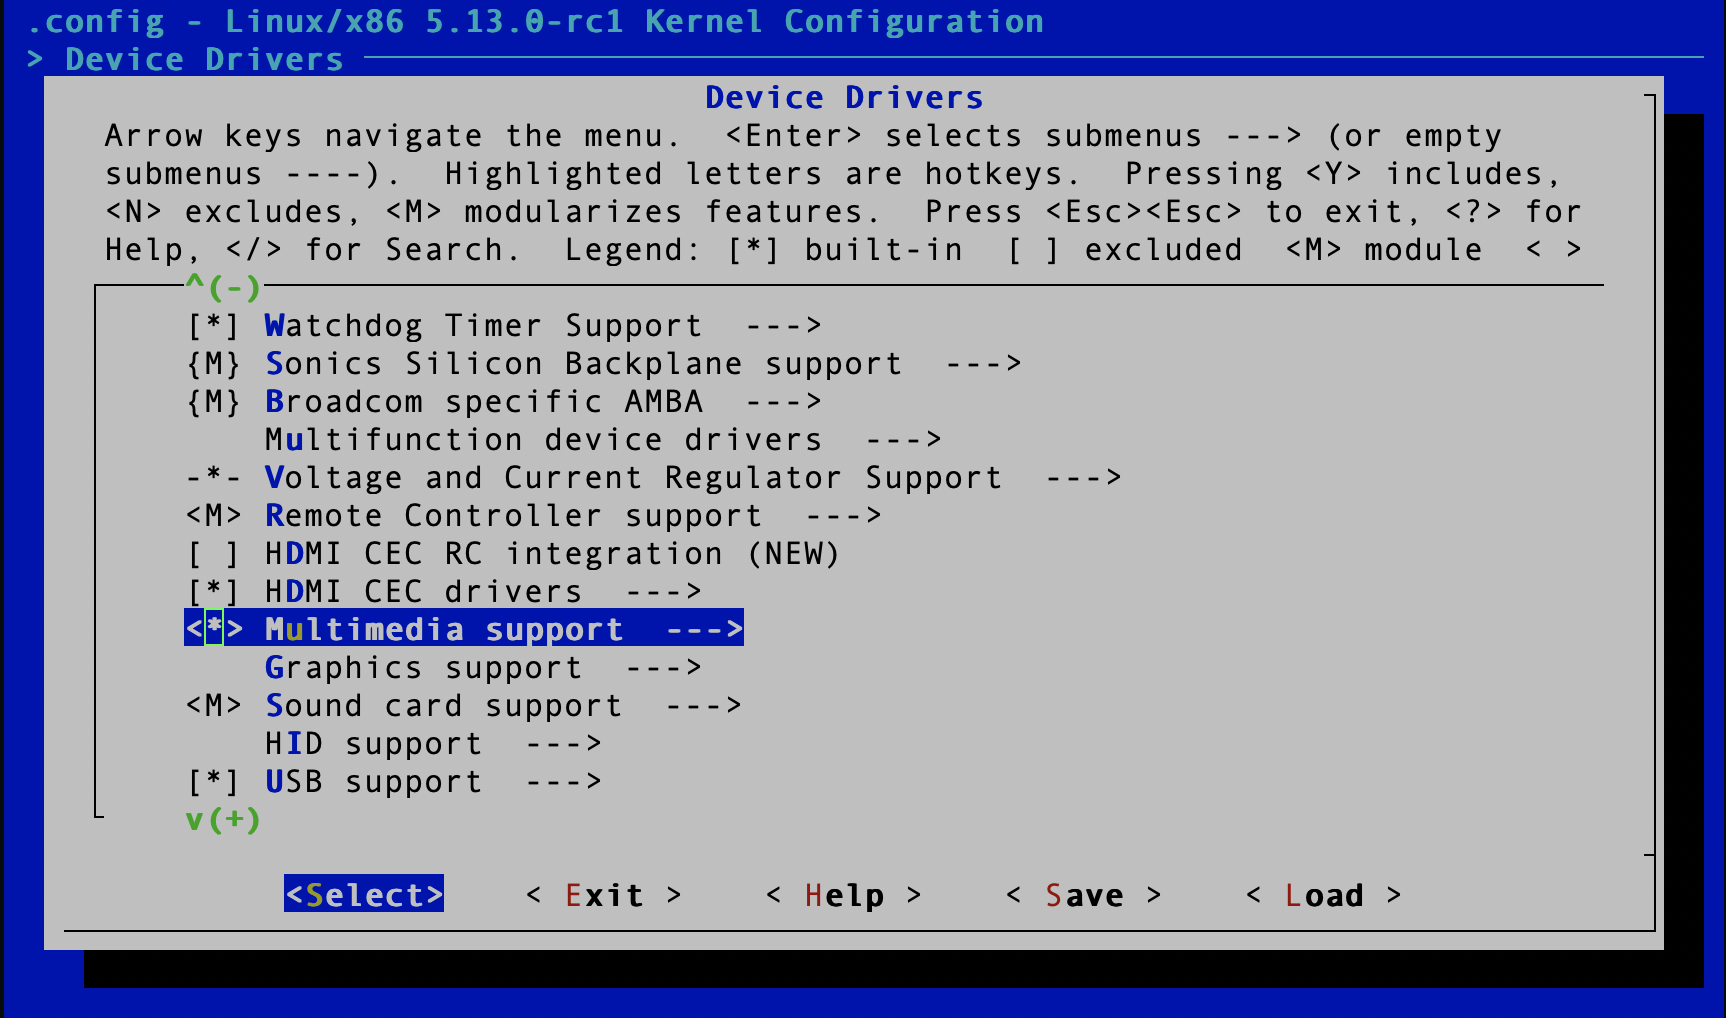 Select Device Drivers, then scroll down to Multimedia support and press y.
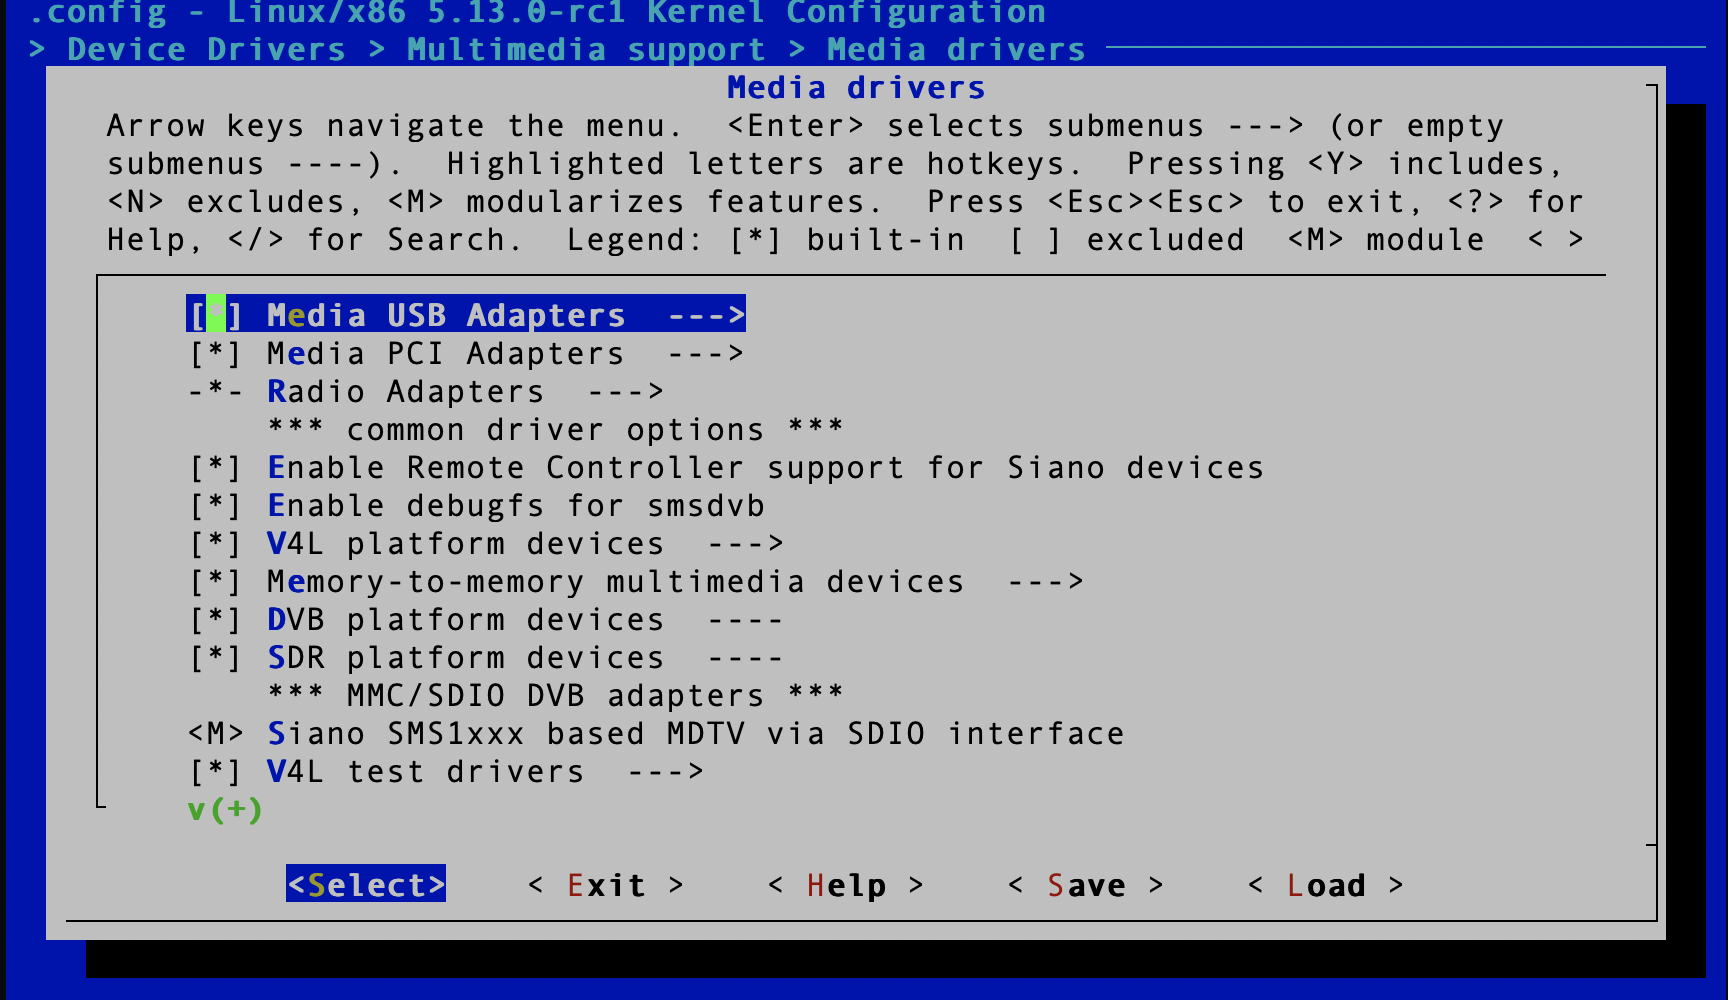
Now that you have included multimedia support, you need to include Media UBS Adapters. Now navigate to Device Drivers->Multimedia support->Media drivers and press y on Media USB adapters.
Alright, we are close. We have to include Video4Linux this is the Linux library that we will use to interface with our USB camera. Navigate to Device Drivers->Multimedia support->Media core support and press y on Video4Linux core.

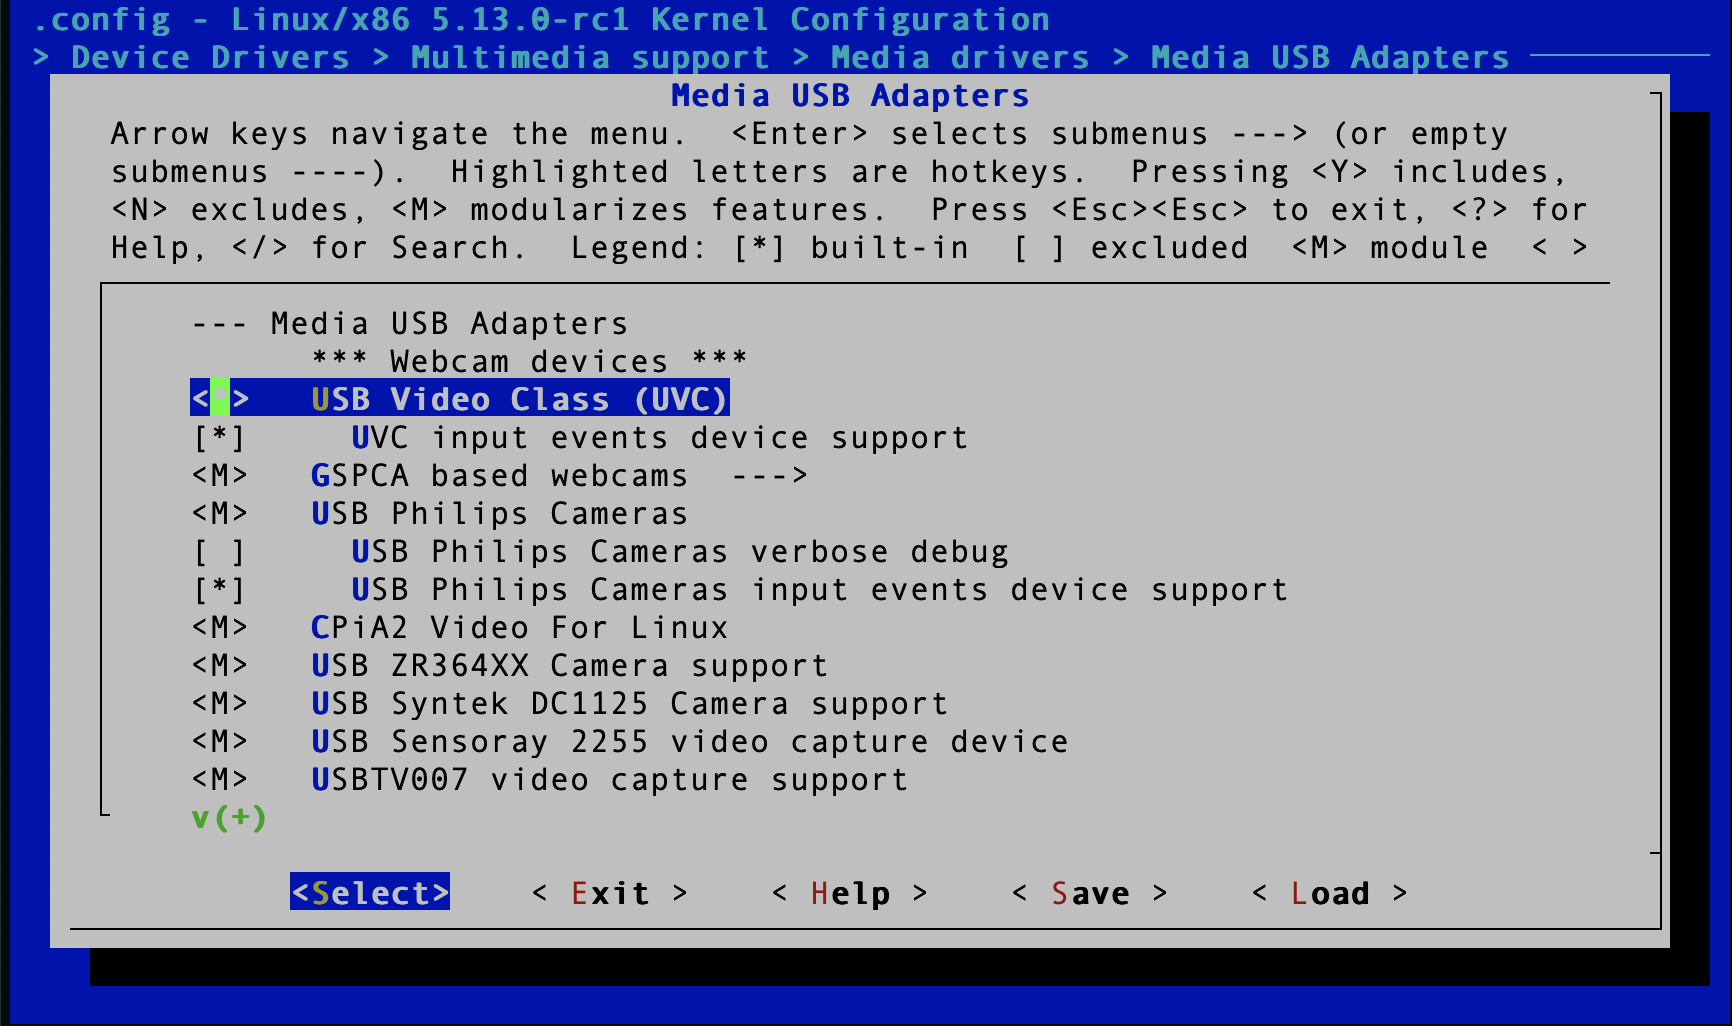
The last thing that we need to include is USB Video Class (UVC). UVC adds support for USB devices that are capable of streaming video.
Alright, that should be it. Now save the file, recompile your kernel, and boot to your operating system with your new kernel.
Getting an Image
Now that you have set up your kernel, we can start writing code! Getting frames is easy. All you need is a single header file. Clone the git repository below to get the header file.
git clone https://github.com/friedrich12/cam.git
Place this header file in the same directory as your code or any place where it can be accessed.
The header file is a simple class-like object that I created in C. It makes it a lot easier to grab images from your USB camera.
 #include <cam.h>

 ImageGetter g;                         // ImageGetter boject
 initialize_imget(g,& "/dev/video0");	// Camera device
 set_img_format(&g);					// Image format
 setup_buffers(&g);						// Setup Buffers
 grab_frame(&g);						// Grab a frame

 char* imgdata = g.buffer;              // Image data
 size_t imgsize = g.bufferinfo.bytesused; // size of buffer
The image format has been hardcoded in the header file in the function set_img_format. If you want to make changes to the header file, you can do so.
To view a list of camera devices run the command below.
ls -ltrh /dev/video*
You might have to do some trial and error to figure out which camera device your USB camera is. If you already have an integrated camera in your device, your USB camera is probably /dev/video1.
Conclusion
Getting images from a USB camera is an essential feature for any application that requires video processing. I hope this tutorial made the process a lot easier. If you are having trouble capturing frames and running the code. Please send me an email at frd20@pitt.edu